In this guide, we'll see how you can update your OGC container after releasing a new version of your app. Using the OGC CLI, we can integrate existing CI/CD pipeline such as GitHub Actions into our OGC deployment flow.
Configure your application
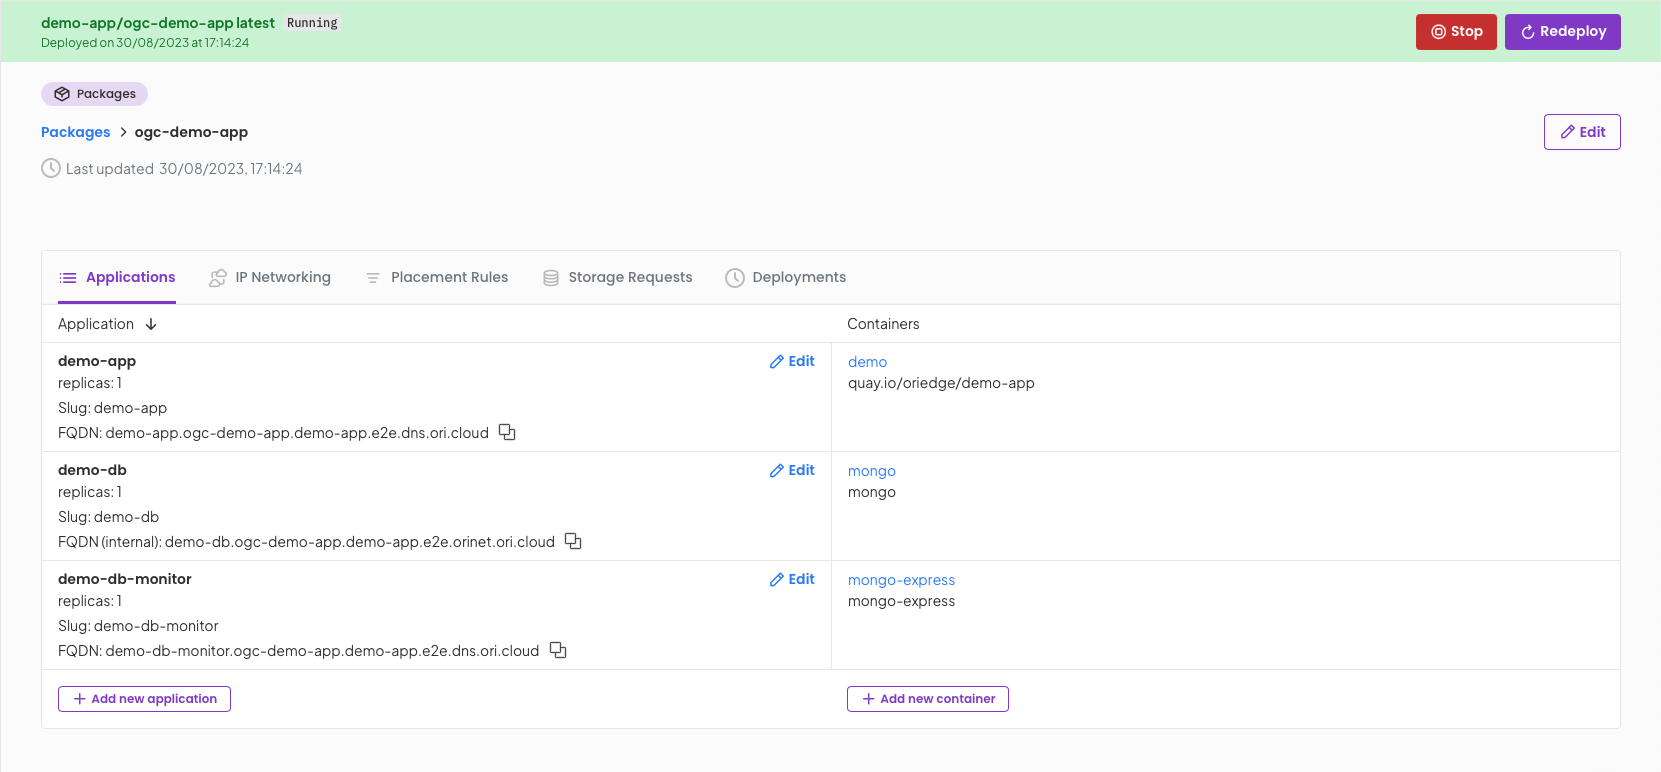
The first step is to configure your application in OGC. In the example below, we have setup a backend application with a MongoDB database and MongoDB Express. Here a tutorial on how to setup a multi-tiered application in OGC.
Setup GitHub Workflow
Once the application is configured, we can create a new GitHub Action that will automatically update the deployment when a new version of the application is pushed.
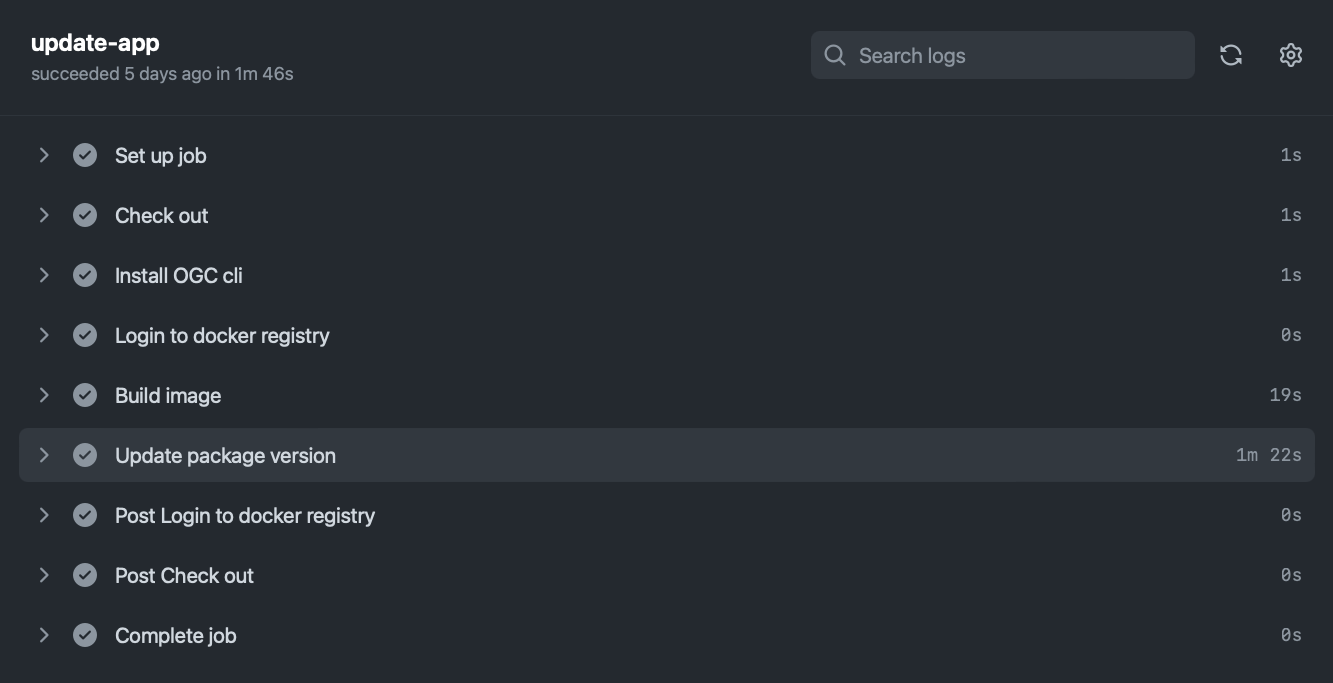
Let's look at a example pipeline run the CLI examples directory:
Installing OGC CLI:
The CLI is available via the install script, or you can also download the binary directly (see the ogc-cli-releases repo). Below we are choosing to use the install script, downloading the latest version and adding it to the path.
- name: Install OGC CLI
run: |
curl https://raw.githubusercontent.com/ori-edge/ogc-cli-releases/main/install.sh | sh
echo "~/.ogc/bin" >> $GITHUB_PATH
Login to registry and build image
In this case, we have a private registry added to our OGC project meaning the deployment will automatically pull the private image. This means that we must login into our registry to push the latest image.
The version comes from a version file setup in the root directory. We are using it to build and push the new version of the app under the new tag.
- name: Login to docker registry
uses: docker/login-action@v2
with:
registry: quay.io
username: ${{ secrets.QUAY_USER }}
password: ${{ secrets.QUAY_PASSWORD }}
- name: Build image
run: |
VERSION=$(cat version) # Get latest version from version file
docker build -t "quay.io/oriedge/demo-app:$VERSION" .
docker push "quay.io/oriedge/demo-app:$VERSION"
Update application
The last thing we need to do is update the container version and re-deploy the package.
- Configure OGC credentials as environment variables
- Get required resource IDs
- Update container
image-tag property with the latest version
- Restart deployment
- name: Update package version
run: |
# Getting resource IDs
PROJECT_ID=$(ogc proj ls --filter-name "demo-app" -x json | jq -rc '.[0].id')
PKG_ID=$(ogc pkg ls -p $PROJECT_ID -x json | jq -r '.[0].id')
DEPLOY_ID=$(ogc pkg get-deployment $PKG_ID -p $PROJECT_ID | jq -r '.id')
APP_ID=$(ogc applications ls -k $PKG_ID -p $PROJECT_ID -f "demo-app" -x json | jq -r '.[0].id')
CONTAINER_ID=$(ogc containers list -a $APP_ID -p $PROJECT_ID -f "demo" -x json | jq -r '.[0].id')
# Stop deployment
ogc deploy stop $DEPLOY_ID -k $PKG_ID -p $PROJECT_ID --wait
# Update application version
VERSION=$(cat version) # Get latest version from version file
ogc containers update $CONTAINER_ID --project-id $PROJECT_ID --image-tag "$VERSION"
# Deploy app
ogc deployments create -k $PKG_ID -p $PROJECT_ID -x json
env:
OGC_USERNAME: ${{ secrets.OGC_USERNAME }}
OGC_PASSWORD: ${{ secrets.OGC_PASSWORD }}
OGC_ORG_ID: ${{ secrets.OGC_ORG_ID }}
Conclusion
Now that we are able to automatically deploy our application via the OGC CLI, deploying applications becomes a solved problem. Regardless of what cluster, cloud provider or region you want to deploy to, this behaviour stays the same.
This, alongside other OGC features such as self heal, automatic networking and storage management across many clusters in any cloud, developers and engineering teams can focus on delivering product value, instead of worrying about infrastructure.